At my house we are always walking dogs. We developed a rule, if you walk anywhere, you take the dogs. Yes I am known as the "Dog Lady" in our neighborhood, I like to think my neighbors don't think of me as the "crazy dog lady" Smiles.....
It's amazing what you learn when walking several routes, numerous times a day. Remember it is always that person out with their dog that is testifying to a crime of some type. We have reported two attempted burglaries, of course we poop and scoop, so I always think I am fairly safe due to the fact that I have several large dogs with me and am usually carrying at least 12 pounds of heavy duty poo.
All of these adventures result in the never ending quest for appropriate outer wear of all kinds of weather. Too hot, too cold, icy, wet, and windy.
We walk multiple dogs, so our hands are not free. My latest pattern is a multi-tasking one. A Hat, Neck Gator and I have even pulled it up over my face in extreme windy/cold conditions. If you don't need it this long, make it shorter, and woo hoo, you will be done even faster! Then it turns into a cap.

This pattern has the flexibility of being:
1-A turtle neck like neck gator, make yours shorter if you don't want it to roll over.
2-Pull this up over your nose, while around your neck
3-Just scrunchie it around your neck, and pull it down lower into your coat.
4-Use the draw string and tighten that up, then pull on for a hat, I made mine long enough that the hat edge can fold over, if you want, or let it stick up like a ski hat. Make yours shorter if you want a simple cap.

Neck Gator/Hat pattern
This is heavy duty, suitable for some of the worst weather, and quick to knit, easy also.
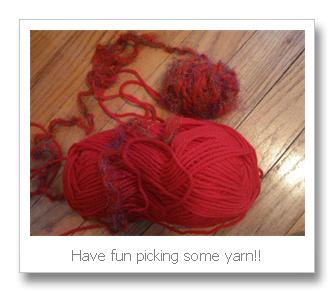
yarn: I used two types held together, a worsted weight 100% wool, and a textural hand spun wool. I estimate each ball was 3 oz or approx. 158 yards each.

needles: size 11 US or 8mm circular, or the needle size you need to make gauge.
stitch: standard rib, knit 2, purl 2 stitch, and a crochet chain stitch for the drawstring (optional, you can use a cord that you can buy)
gauge: 8 stitches, 11 rows, 4 inch square
Fits an average adult size head, approx. 19-23 inches.
bead: I used a bead for the draw string, you need one with a large hole, I usually find wooden beads have the largest holes.
Crochet hook: If you are going to chain a draw string, use a crochet hook size that is recommended for your yarn, use the most smooth yarn, you will be using just one strand.
Pattern:
Using two yarns held together throughout the pattern
Cast on 48 stitches, if you need a smaller or larger pattern, just make sure your total number of stitches are a multiple of 4.
Take care not to twist cast on, join
Now: knit 2, purl 2, since we are knitting in the round, keep this up! You will be surprised how good this looks and how fast you are going!
I made my Hat/gator about 12 inches long, you make yours the length you need.

I wanted mine to be able to fold down like a turtle neck, or keep long and pull it up around my face. I also wanted to be able to gather the top with a draw string, next step, so I could wear it as a hat, with a fold over edge, if you want more of a cap, make it shorter.
When you have your hat/neck gator as long as you desire, cast off, you can use all knit to cast off, not too tight, you may want to use a size larger needles to cast off, if you are a tight knitter. Here is a tutorial on a stretchy cast off you might want to try from Knitting Daily.
Now if you want a cord to use as a draw string to gather the top of your gator up for a hat, then.....

Using one strand of yarn, the most simple yarn, or less fuzzy, get your crochet needle out, use the size, or close to it, that your yarn label recommends. Here is a detailed tutorial on how to make a crochet chain, from Sandi Marshall, thanks Sandi!, Give it a try.
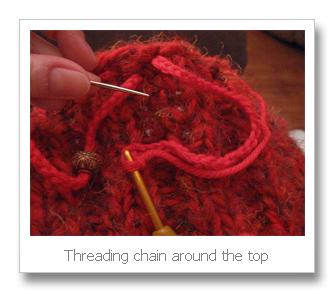
OK, I made my chain about 32 inches long, I actually like to thread of end onto a needle as I am making it and start threading it back and forth in the end of the tube that will be the top of my hat, if one of the ends looks not as neat as the other use this one.
Make your chain as long as you need, remember you can always knot it and cut some off, if it is too long. It needs to be big enough to go over your head.
After weaving this in and out on your edge, then thread your button on. Now knot your ends together.
And now take a look at your finished product and go for a walk....
Copyright
This is pattern is free for personal, non-commercial use. Further use requires permission from the designer (me). You may not sell or distribute the pattern in any form. You may not sell the any item or items made from this pattern without my permission. You may not use this pattern or items from the pattern for commercial use.
May your knitting needles fly as fast as Dragonflies....
Happy Holidays and keep warm.
I like it very much. Just perfect for when you are out on long walks and the weather can change by the minute.
ReplyDeleteLike the new look of the blog too. The blue background is easy on the eyes. Good job.
Very nice pattern Vicki. I sure like it and may give it a go. Nice for working outside in the winter. Hubby could use it when getting wood!
ReplyDeleteIngenious!
ReplyDeleteCan you tell I'm a dog walker too?
WOW-what a great idea, I love it! I just discovered your blog today and I'm so glad I did.
ReplyDeleteThis is perfect for our area of the woods where it can go from perfect and windless to border-line stormy in a few hours. We take our dogs on LONG walks (four hours yesterday!) and I'm always hauling a pack full of layers for both of us-this is perfect! I'll be linking.
OMG, Congratulations on having this pattern featured on the Chum! Well deserved.
ReplyDeleteThis craft is awesome and I can't wait to make it!
ReplyDeleteCan you tell me what length or circular needles you used. I know you said you used an 8mm (or size for gauge), but how many inches (or cm) was the circular?
Thanks!
This pattern is awesome, I can't wait to make it!
ReplyDeleteYou've mentioned you used an 8mm circular needle, can you tell me what length of circular you used?
Thanks!
Stephanie, I couldn't reply as you commented and your profile won't let me,
ReplyDeleteSorry for the delay in my reply! My computer has been down!
I'm glad you are enjoying the pattern, it is still one of my favorite!
I am a "loose" knitter, but I used a size 9 needles, I think somewhere between a 8-10 would be good depending on how tightly you knit!
Thanks
Vicki
Use the draw cord and bind that up, again cull on for a hat, I fabricated abundance continued abundant that the hat bend can bend over, if you want, or let it stick up like a ski hat.
ReplyDeletePorkpie Hats
This comment has been removed by a blog administrator.
ReplyDelete