The Shrinking Husband

Two years ago I started a flannel hiking shirt for my husband. I have always made his shirts. Well I had a major stall out, then a year ago I picked it up again and got it done except for the buttons. I discovered I had to “adjust it” due to weight loss. OK, so I tweak it a little, and it fits.

Fast forward to a year later and the shirt is mocking me from the corner of my stash room,  I finally decide to put the buttons on and give it to him. Thankfully I decide he better try it on before I do! I look, and oh no, it is huge!

So I spent longer today, ripping it out and adjusting it, then I think it would have taken me to toss it, and start over. *grin* When altering men’s shirts, one thing leads to another.

002

I agree with Syd, “wake me when the nightmare is over”….

Back too wide + sleeves too long, this leads to eventually ripping everything out, and even making the collar shorter, due to a smaller neck. I went from tweaking it to being “all in”, The pockets are in the wrong place now and I’ve made a hole getting them off. Ugh….

Ok, after a break, and adjusting all of the pieces, I finally come up with a solution to the hole from the pocket rip out.

011

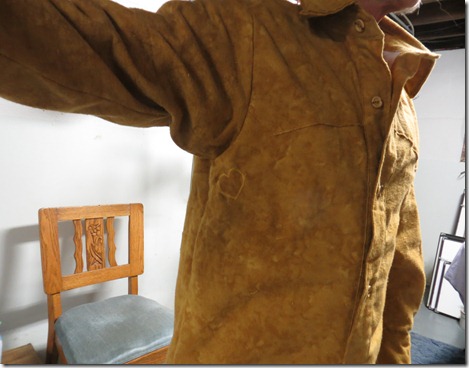
Look closely at the little heart under the arm. Well, it’s the best I could come up with. *grin*

008

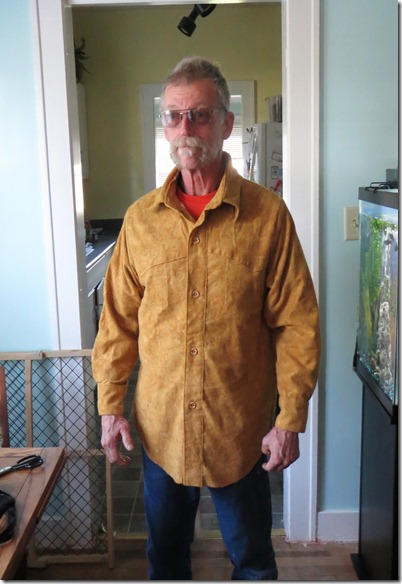
End result, fits a lot better, may still be a bit big, (hem not done yet), but it will do.
Comments

  1. I think it looks darn good! Kudos to you for being so industrious!

    Love ya!
    T

    ReplyDelete
  2. Im im presseed none the less! I want one

    ReplyDelete
  3. Anonymous10/11/2012

    You have more perseverance than I. I would have tossed the shirt and started from scratch.

    ReplyDelete
  4. You are amazing, I couldn't have done that!

    ReplyDelete
  5. So close to tossing the thing out and buying a new pattern and fabric, wonder if it wouldn't have been faster?
    But now that he has been wearing it for about a week, it seems to be worth it. The flannel is very thick and seems to be getting really soft with all of the washing *grin*
    vicki

    ReplyDelete

Post a Comment

Thank you for leaving a comment I love reading them and really appreciate you taking the time to let me know you were here!

Popular posts from this blog

Review of a Kick Spindles Or Mother Marion to spin

When I made the decision to buy a Kick spindle I could find very little info on it, anywhere. Below is what I gathered, bought and my experience with mine. I could only find two being marketed, since I purchased mine I have found a third. Below is my views on the Kick spindle I purchased (Little Meggie from Heavenly Handspinning), and some info on all of the other Kick Spindles that I could locate. Links and costs are included. Review: Things I like about my Kick Spindle. 1. Long spin time, I like the addition of the ball bearing. 2. Leaves both hands free to draft 3. It's my "wheel" 4. I like using my foot, I am moving around and don't get stiff from one position. It's a very "active" type, rhythmic motion. 5. You can actually stand and use it also. 6. Great price point. 7. I have never spun on a wheel and when I sat down at one the first time, I could actually spin (some) I think this action of foot/hand coordination helped. 8.

Aran Shrug, Bridesmaid Wrap, Baby Bunting Pattern free

Here is the start of my "Bridesmaid wrap" from " Wedding Knits " by Suss Cousins. I am making it out of heavier yarn, From Handpainted yarns I love the yarn it is so soft and the colors are beautiful. The wrap is made in mohair in the book. I plan on making it a shorter wrap, due to the heavier yarn. I hope it turns out OK . If you check out the book link, there is photo of it. If you want a free Bridesmaid wrap pattern this is a lovely one from Knitty! I made this baby bunting, on the spur of the moment, just playing around. I used one skein of red heart yarn, and a small amount of the fun fur yarn in a coordinating color. Cast on 80 stitches at 4 sts /inch. Knit in the round, until 24 inches long. If you would rather knit flat, knit even rows, purl odd rows. Add Fun fur yarn, or other novelty yarn for the last 10 rows. Bind off, using a very loose bind off. I like to use the Elizabeth Zimmerman method of the Sewn Bind off

Knitted Flat Slouchy Hat Pattern

I’m still tweaking my flat slouchy hat pattern. Here is the next in the series. This is a slouchy hat pattern, knitted flat. It is easy for a beginning knitter! Super slouchy hat, pattern below…. I originally started making this pattern when I didn’t have access to my circular needles. It was fast and fun. With cuff turned up (below) Super Slouchy Knitted Flat Hat Pattern (bulky yarn) Pattern: Flat Slouchy Hat (SuperBulky Yarn) Slouchy hat knitted flat and sewn together, suitable for beginning knitter Yarn Used: Super Bulky Lion Brand Hometown USA, I used 1 and a third skeins which is about 110-120 yds of  super bulky yarn Gauge: 13 stitches x 9 rows, 4x4 inches Needles: US 13 or size to get gauge Cast On: 42 Stitches Ribbing: Row 1: K1, P1, repeat to end Row 2: Repeat row 1 until, your ribbing is as long as you desire, mine is approx. 5 inches long. Body: Row1: (Knit 3, Inc 1)* repeat until end of row (total 55 stitches) (see link here, for all types of increase ex