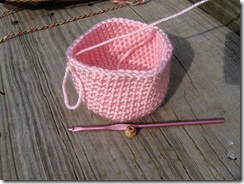
Crochet Ditty bag, good for coins, trinkets, etc…


017

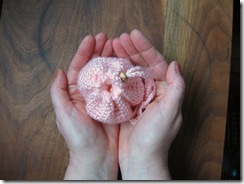
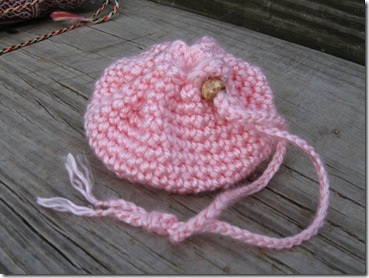
Playing around a little, and ended up making a small crochet bag. It looks good. I used Caron Simply Soft yarn, because I like the sheen it has, the stitches are very distinct with it.

One skein will make many bags. 069
015

You will also need a crochet hook, I used size F, but if you use a different yarn, use the size indicated on the label, or one size smaller, to get a tight stitch.

Tutorials (video) all below!

Chain Stitch

Single Crochet

Slip Stitch

I also used one wooden bead. shop around and see what would be good, look at the interior hole of the bead. You want it to be tight, to keep the bag closed. But be able to thread it on the chained cord.

Single crochet. slip stitch and chain stitch is used.

Rnd 1: Chain 6, slip stitch to first stitch

Rnd 2:  *2sc in each st* repeat 6 times (12 st total)

Rnd 3:  *2sc in first st, 1sc in next st* repeat 6 times (18st total)

Rnd 4:  *2sc in first st, 1sc in next 2st* repeat 6 times (24st total)

Rnd 5: sc all around.

Rnd 6: *2sc in first st, 1sc in next 3st* repeat 6 times (30st total)

Rnd 7:  *2sc in first st, 1sc in next 4st* repeat 6 times (36st total)

Rnd 8-12: sc all around

This should be large enough to be your base of your bag.

Now sc all around to make the sides, continue in this manner until the sides (when pressed down) are equal to your bottom.

Next row: slip stitch all around, this makes a reinforced top.

Break yarn, and weave in all ends.

Now chain a string long enough for your bag. I usually put a yarn needle on the end of my chain string, and weave it in and out, under the slipstitch row of the top of the bag. This way I know how long to make it. Keep chaining until long enough to suit your needs.

Break the yarn, and take your bead, (you may need a yarn needle here)  Place your bead on, and you are ready to load your bag with goodies!
Comments

  1. How cute! I have much yarn that could be put to use for those cute little ditty bags. Thanks for the pattern.

    ReplyDelete
  2. Too cute! I see you're back in full knitting swing ;-)

    ReplyDelete
  3. This bag is adorable! I wish I had paid attention when my MIL and Aunt taught me how to crochet. I'm no good at keeping a consistent tension.

    ReplyDelete

Post a Comment

Thank you for leaving a comment I love reading them and really appreciate you taking the time to let me know you were here!

Popular posts from this blog

Review of a Kick Spindles Or Mother Marion to spin

When I made the decision to buy a Kick spindle I could find very little info on it, anywhere. Below is what I gathered, bought and my experience with mine. I could only find two being marketed, since I purchased mine I have found a third. Below is my views on the Kick spindle I purchased (Little Meggie from Heavenly Handspinning), and some info on all of the other Kick Spindles that I could locate. Links and costs are included. Review: Things I like about my Kick Spindle. 1. Long spin time, I like the addition of the ball bearing. 2. Leaves both hands free to draft 3. It's my "wheel" 4. I like using my foot, I am moving around and don't get stiff from one position. It's a very "active" type, rhythmic motion. 5. You can actually stand and use it also. 6. Great price point. 7. I have never spun on a wheel and when I sat down at one the first time, I could actually spin (some) I think this action of foot/hand coordination helped. 8.

Aran Shrug, Bridesmaid Wrap, Baby Bunting Pattern free

Here is the start of my "Bridesmaid wrap" from " Wedding Knits " by Suss Cousins. I am making it out of heavier yarn, From Handpainted yarns I love the yarn it is so soft and the colors are beautiful. The wrap is made in mohair in the book. I plan on making it a shorter wrap, due to the heavier yarn. I hope it turns out OK . If you check out the book link, there is photo of it. If you want a free Bridesmaid wrap pattern this is a lovely one from Knitty! I made this baby bunting, on the spur of the moment, just playing around. I used one skein of red heart yarn, and a small amount of the fun fur yarn in a coordinating color. Cast on 80 stitches at 4 sts /inch. Knit in the round, until 24 inches long. If you would rather knit flat, knit even rows, purl odd rows. Add Fun fur yarn, or other novelty yarn for the last 10 rows. Bind off, using a very loose bind off. I like to use the Elizabeth Zimmerman method of the Sewn Bind off

Knitted Flat Slouchy Hat Pattern

I’m still tweaking my flat slouchy hat pattern. Here is the next in the series. This is a slouchy hat pattern, knitted flat. It is easy for a beginning knitter! Super slouchy hat, pattern below…. I originally started making this pattern when I didn’t have access to my circular needles. It was fast and fun. With cuff turned up (below) Super Slouchy Knitted Flat Hat Pattern (bulky yarn) Pattern: Flat Slouchy Hat (SuperBulky Yarn) Slouchy hat knitted flat and sewn together, suitable for beginning knitter Yarn Used: Super Bulky Lion Brand Hometown USA, I used 1 and a third skeins which is about 110-120 yds of  super bulky yarn Gauge: 13 stitches x 9 rows, 4x4 inches Needles: US 13 or size to get gauge Cast On: 42 Stitches Ribbing: Row 1: K1, P1, repeat to end Row 2: Repeat row 1 until, your ribbing is as long as you desire, mine is approx. 5 inches long. Body: Row1: (Knit 3, Inc 1)* repeat until end of row (total 55 stitches) (see link here, for all types of increase ex