Virgin needle felting

I bought a needle felting kit from Wildhare Fiber Studio on Etsy.  It was reasonable, and had everything I needed.

I have never done any needle felting, but was intrigued by the Spin, Knit and Life blog and her results. She directed me to this great site.

I decided to begin with my first attempt on my Sophie bag by Julie Anderson (rav link) . Which I actually saw on the Instructables site first and became interested in.

It is a very easy felted bag, it would be great for a first time knitted project, the handles provide a quirky interest and make it look more complicated than it is.

001

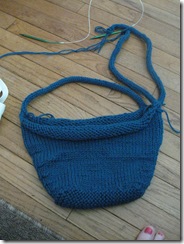
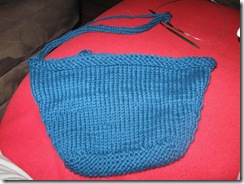
Bag is quickly knit and I start on the handle, along the way I decide to make it a tri handle twined bag instead of two twined together. Because, hey who can make a pattern without a little tweaking.

007

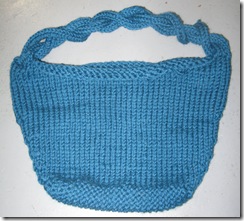
Then just twist them all and attach. Easy.

018 020

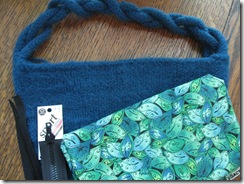
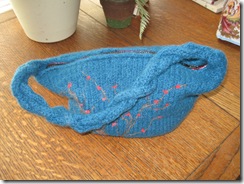
Prefelted photo and a close up of the handle.

024

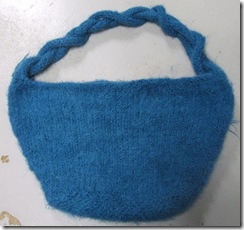
Here we are post felting.

Then I decided to pick out some fabric to line it with, I hate to have a knitted purse that droops and stretches out.

005

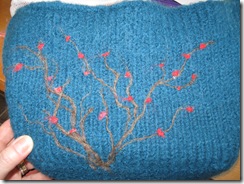
Inspired by the leaf print, and looking for something simple I tried to felt a tree like silhouette and add some buds of color, then wondered if I should add leaves or grass or maybe a bird, and then realized I might be headed toward the Bedazzler syndrome, (no one with a Bedazzler can put just one stud or rhinestone on an item)

019

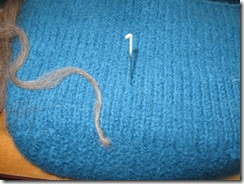
Start with a branch?

020

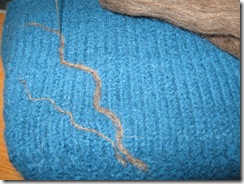
Make two

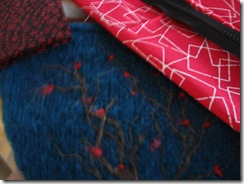
022 I decided to stop here. Although it was really hard not to keep going, I was afraid I would make my purse into a ugh.

Lining your bag, especially if knitted, makes it sturdy, and resistant to stretching. It is easy to do and you can include pockets if you wish. Adding a zipper is also an option.

After needle felting I decided my first choice of fabric wasn’t the best. I wanted something to high light the buds on the branches.

032

I decided on two different prints with red in them.

A little measuring, pinning and sewing and …..

037

I’m done!

038

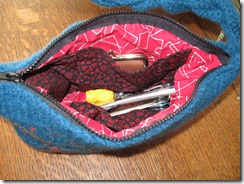
Ready to organize all the things you need.

040

Ready to go….

May your knitting needles fly as fast as dragonflies…
Comments

  1. The bag looks great. Love the branches and the buds!

    ReplyDelete
  2. Did you know that if you felt your knitting a little more, it won't stretch out of shape? Felting actually strengthens your fabric so much that unless it becomes wet, nothing will stretch it out...of course, that usually means that you have to block your felted item before it dries so it will be in the shape you want.

    ReplyDelete
  3. I have looked at that felting kit to make a bar of soap! I'll be interested in what you think of it.

    That purse is fantastic! I love everything you did from the lining to the needle felting - plus the zipper too. Total awesomeness! Enjoy :)

    ReplyDelete
  4. You done good, girl! I like it!

    ReplyDelete
  5. What a cute purse!

    My first felting project was a disaster. If I had your success, I might never have tossed in the hat.

    ReplyDelete
  6. Beautiful! You did a great job.

    ReplyDelete

Post a Comment

Thank you for leaving a comment I love reading them and really appreciate you taking the time to let me know you were here!

Popular posts from this blog

Review of a Kick Spindles Or Mother Marion to spin

When I made the decision to buy a Kick spindle I could find very little info on it, anywhere. Below is what I gathered, bought and my experience with mine. I could only find two being marketed, since I purchased mine I have found a third. Below is my views on the Kick spindle I purchased (Little Meggie from Heavenly Handspinning), and some info on all of the other Kick Spindles that I could locate. Links and costs are included. Review: Things I like about my Kick Spindle. 1. Long spin time, I like the addition of the ball bearing. 2. Leaves both hands free to draft 3. It's my "wheel" 4. I like using my foot, I am moving around and don't get stiff from one position. It's a very "active" type, rhythmic motion. 5. You can actually stand and use it also. 6. Great price point. 7. I have never spun on a wheel and when I sat down at one the first time, I could actually spin (some) I think this action of foot/hand coordination helped. 8.

Aran Shrug, Bridesmaid Wrap, Baby Bunting Pattern free

Here is the start of my "Bridesmaid wrap" from " Wedding Knits " by Suss Cousins. I am making it out of heavier yarn, From Handpainted yarns I love the yarn it is so soft and the colors are beautiful. The wrap is made in mohair in the book. I plan on making it a shorter wrap, due to the heavier yarn. I hope it turns out OK . If you check out the book link, there is photo of it. If you want a free Bridesmaid wrap pattern this is a lovely one from Knitty! I made this baby bunting, on the spur of the moment, just playing around. I used one skein of red heart yarn, and a small amount of the fun fur yarn in a coordinating color. Cast on 80 stitches at 4 sts /inch. Knit in the round, until 24 inches long. If you would rather knit flat, knit even rows, purl odd rows. Add Fun fur yarn, or other novelty yarn for the last 10 rows. Bind off, using a very loose bind off. I like to use the Elizabeth Zimmerman method of the Sewn Bind off

Knitted Flat Slouchy Hat Pattern

I’m still tweaking my flat slouchy hat pattern. Here is the next in the series. This is a slouchy hat pattern, knitted flat. It is easy for a beginning knitter! Super slouchy hat, pattern below…. I originally started making this pattern when I didn’t have access to my circular needles. It was fast and fun. With cuff turned up (below) Super Slouchy Knitted Flat Hat Pattern (bulky yarn) Pattern: Flat Slouchy Hat (SuperBulky Yarn) Slouchy hat knitted flat and sewn together, suitable for beginning knitter Yarn Used: Super Bulky Lion Brand Hometown USA, I used 1 and a third skeins which is about 110-120 yds of  super bulky yarn Gauge: 13 stitches x 9 rows, 4x4 inches Needles: US 13 or size to get gauge Cast On: 42 Stitches Ribbing: Row 1: K1, P1, repeat to end Row 2: Repeat row 1 until, your ribbing is as long as you desire, mine is approx. 5 inches long. Body: Row1: (Knit 3, Inc 1)* repeat until end of row (total 55 stitches) (see link here, for all types of increase ex